Rust xtc.clinic External Cheat
If you'd like to purchase it, you can do so from this link: Buy Now.
If you are using external spoofer. Always run the cheat first and then the spoofer. If you run the spoofer first and then the cheat, you will get banned.
External products are better for undetection
Product does not have spoofer. This means if you got banned you will get hwid banned.
If you want to purchase spoofer, you can do so from this link: Buy Now.
Required Files
Download all required files before starting:
Preparing Your USB Drive
Follow the steps below to format your USB drive properly and prepare it for use. If you encounter any issues, feel free to reach out to our support team for assistance.
-
Plug your USB drive into an available USB port on your computer.
-
Press
Win + Eto open File Explorer and locate your USB drive under "This PC" or "My Computer." -
Right-click on your USB drive and select Format from the dropdown menu.

"Page after clicking Right Click and Format on the USB drive"
-
In the Format window:
- Choose FAT32 under the "File System" dropdown
- Optionally, set a name for your drive in the "Volume Label" field
-
If you want a faster process, check the box for Quick Format. Leave it unchecked for a more thorough format.
-
Click the Start button to begin the formatting process. A warning will pop up informing you that all data on the USB will be erased—ensure you've backed up important files.
-
The format process will only take a few moments. Once finished, you'll see a confirmation message.
Important Notes
- Formatting will erase all data on the USB drive. Ensure you back up important files before proceeding.
- If your USB drive is larger than 32GB, Windows may not offer FAT32 as an option. In this case, you can use third-party tools like Rufus or GUIFormat to format it.
Installing EFI Bootloader on USB
Follow these steps to download the EFI Bootloader and set it up on your USB drive:
Download the EFI Bootloader Files
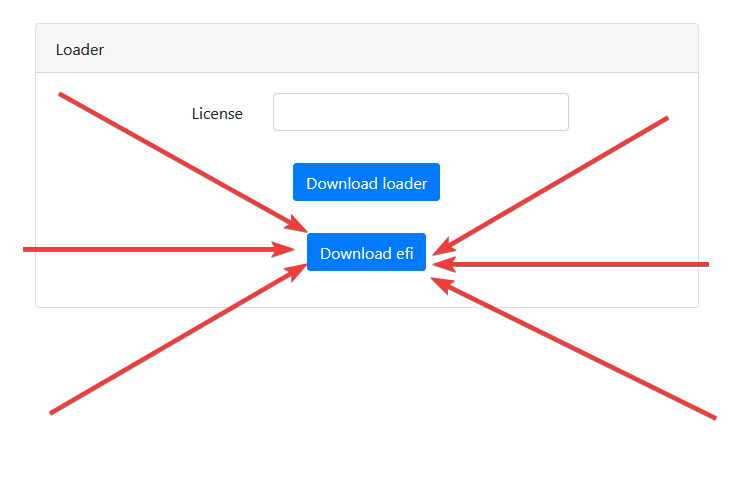
Please click "download efi" to download the EFI Bootloader.
-
Open your web browser and navigate to the download link: Download EFI Bootloader
-
The file will automatically start downloading. Once the download is complete, locate the
.zipfile in your Downloads folder or the specified download location.

"Path should look like so after extracting the EFI on the USB"

"bootx64.efi should be in the following order USB:\EFI\Boot\bootx64.efi"
Extract the Files to the USB Drive
-
Right-click the downloaded
.zipfile and select Extract All or use a program like 7-Zip to extract the contents. -
Choose your USB drive as the destination folder for the extraction. For example, if your USB drive is labeled "D:", extract the files directly to
D:\. -
Ensure the extracted contents are placed in the following folder structure: D:\EFI\Boot\bootx64.efi
Booting from the USB Drive
Once you've successfully prepared your USB drive, you can boot your system from it using one of two methods:
Method 1: Hold Shift and Select Boot Device
-
Restart Your Computer Save any work and restart your computer.
-
Hold the Shift Key While your computer is restarting, immediately hold down the Shift key on your keyboard.
-
Select the Boot Device
-
Choose the USB Drive In the list of available boot devices, select your USB drive. It might be listed as a Removable Device, USB HDD, or the name of your USB drive.
-
Boot from the USB Your computer will boot from the USB drive, and the EFI Bootloader will load.
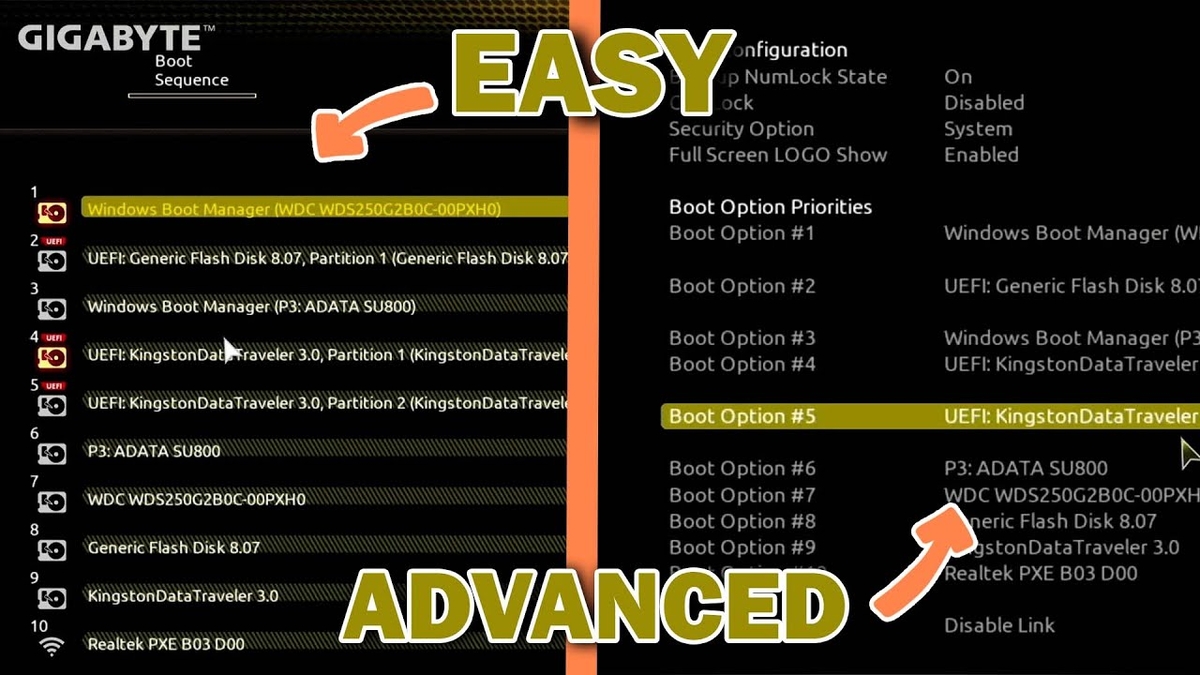
Method 2: Rearrange Boot Order in BIOS/UEFI
-
Restart Your Computer Save any work and restart your computer.
-
Enter the BIOS/UEFI Settings During the boot process (before Windows starts loading), repeatedly press the BIOS/UEFI access key. This is typically one of the following, depending on your system:
F2,F12,DEL, orESC(Check your computer's manual or on-screen instructions for the correct key)
-
Navigate to the Boot Menu Once in the BIOS/UEFI settings, find the Boot or Boot Order section. The exact location will vary depending on your motherboard, but it's typically in the Boot, Boot Options, or Advanced Settings menu.
-
Change Boot Order
- Use the arrow keys to highlight the Boot Order or Boot Priority option.
- Move your USB drive to the top of the list using the instructions shown on screen (usually
+or-to move the USB device). - Save your changes by following the on-screen prompts (usually by pressing
F10to save and exit).
-
Exit BIOS/UEFI After saving the new boot order, exit the BIOS/UEFI settings. Your system will restart.
-
Boot from USB Your computer will now boot from the USB drive automatically, and the EFI Bootloader will load.
How to Inject the Cheats
Follow these simple steps to inject the cheats and start using your product:
1. Register an Account
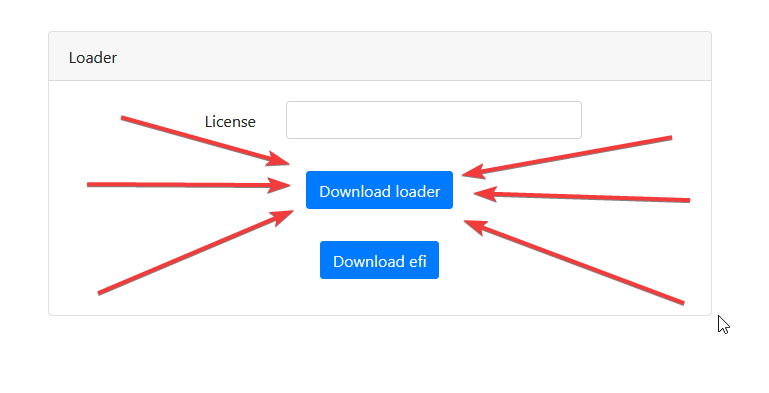
Download the loader and follow the steps below to register an account:
-
Open the loader application you've downloaded.
-
Click on the Register button to create your account.
-
Fill in your details, including a username and password.
- Make sure to choose a unique username and a secure password.
-
After entering your details, click Register to create your account.
2. Log In to Your Account
-
After registration, log in using the username and password you just created.
-
Click Login to access your account.
3. Redeem Your Key
-
Once logged in, look for the Redeem field.
-
Enter your license key in the Redeem field.
- You should have received your license key via email after purchase. Check your inbox for the email and copy the key.
-
Click Redeem to activate your product.
4. Launch the Loader
-
After the key has been successfully redeemed, the Launch button will become available.
-
Click Launch to start the loader.
5. Wait for the Loader to Close
-
Once you click Launch, wait for the loader to fully close. This may take a few moments.
-
Ensure the loader has fully exited before proceeding.
6. Open the Game
-
After the loader has closed, open the game that the product is for.
-
Once you see a message box saying "Press OK to inject in game" wait for the game to fully load and then press it. Don't press it before time or else it might fail.
Troubleshooting Guide
Error 0x399 - Invalid Process Name
This error occurs when the game injection process fails due to an invalid or empty process name.
Possible Causes & Solutions:
- Game Not Running – Ensure the game is launched before injecting
- Permissions Issue – Try running the game as an administrator
- Antivirus Interference – Some security software may block the injection process. Temporarily disable it to test
- Corrupt or Missing Files – Reinstall the injector or verify game files
Error 0x400 - Invalid Process ID
This error occurs when the specified process name does not have a valid process ID.
Possible Causes & Solutions:
- Game Not Running – Ensure the game is launched before injecting
- Game Crashed or Closed – If the game closed unexpectedly, restart it and try again
- Delayed Process Detection – Wait a few seconds after launching the game, then attempt injection again
- Restart & Retry – Close the game completely, restart it, and attempt injection again
Error 0x402 - Missing Payload Handle
This error occurs when the mapped payload handle is missing, indicating driver mapping failure.
Possible Causes & Solutions:
- Driver Not Loaded – Ensure proper driver mapping before injecting. Restart the loader and try again
- Insufficient Permissions – Run the loader with administrator privileges
- Antivirus or Security Software – Security programs may block driver mapping. Temporarily disable them
- Driver Crash or Unload – If driver was unloaded, restart the system and reload
- Corrupt or Missing Loader Files – Reinstall the loader
Error 0x403 - No Payload Communication
This error indicates failure in establishing connection between the cheat and driver.
Possible Causes & Solutions:
- Communication Blocked – Security software or Windows Kernel protections may interfere
- Reboot & Retry – Restart the system to reload necessary modules
Error 0x406 - Render Setup Failure
This error occurs when the system fails to load required modules during initialization.
Possible Causes & Solutions:
- Corrupt System Files – Run
sfc /scannowto verify system file integrity - Incorrect System Configuration – Check system environment variables and settings
- Missing Dependencies – Ensure all required system dependencies are available
- Reboot & Retry – Restart system to reload modules
Error 0x407 - Window Handle Error
This error occurs when unable to retrieve the window handle (HWND).
Possible Causes & Solutions:
- Game Window Not Active – Ensure game window is active and not minimized
- Window Not Initialized – Wait for game window to fully load
- Reinject & Retry – Try reinjecting the loader
Error 0x408 - Overlay Initialization Failure
This error occurs when the overlay fails to initialize properly.
Solution:
- If persistent, open a support ticket for assistance
Error 0x409 - DirectX Failure
This error indicates issues with DirectX initialization.
Possible Causes & Solutions:
- Outdated Graphics Drivers – Update your GPU drivers:
- NVIDIA Drivers
- AMD Drivers
- Intel Drivers
- DirectX Installation – Verify DirectX installation and update if needed
- System Resources – Check available memory and GPU resources
- Hardware Compatibility – Verify hardware meets DirectX requirements
- Reinject & Retry – Try reinjecting after updates
Error 0x601 - DTB Not Found
This error occurs when the Directory Table Base cannot be located.
Possible Causes & Solutions:
- Kernel Access Blocked – Check security software interference
- Unsupported System – Verify OS compatibility
- Memory Corruption – Restart system and reinject
Error 0x602 - Image Base Error
This error occurs when failing to retrieve the process image base address.
Possible Causes & Solutions:
- Process Not Fully Loaded – Wait for complete game initialization
- Reinject & Retry – Reinject loader and retry
Error 0x603 - Module Not Found
This error occurs when a required module cannot be found in the target process.
Possible Causes & Solutions:
- Game Not Fully Loaded – Wait for complete game initialization
- Corrupt Game Files – Verify game file integrity
- Restart & Retry – Restart game and retry injection
DYT2 / YT2 - Server Connection Error
This error indicates server connectivity issues.
Solution:
- Restart the Loader – Usually resolves the issue
- Check Server Status – If widespread, open a support ticket